Thursday, April 12, 2012

97 A Simple DIY Jewelry Display

Something I don't do often enough is wear jewelry.  I never have been a jewelry crazy gal, but when I started having babies, and then watched kidlets daily for a couple of years, the number of times I actually wore jewelry in a given year could be counted on one hand.  I typically would wear stud earrings since those were easiest to keep away from little fingers, but now that my kids are older, I have been getting the urge to start branching out a bit.

The one thing I noticed however, is that I never really had a solid system for storing the jewelry I WANT to wear.  As they say, it was also out of site, out of mind.  So a little over a year ago when I created my jewelry earring display, I found myself wearing earrings more often!  Funny how that works.


So I decided to reinvent the jewelry storage/display wheel for the 17,489th time, and finally get the rest of my jewelry out of hiding.


Since I already had a great system for the earnings, I wanted something that would work in a similar fashion, and mimic what was already in place.

In fact, I removed the earrings from the original frame and reused that for my necklaces since I liked the size.  I only have a few necklaces and they are fairly basic, the easiest and simplest solution for me was to just add a cheapo piece of cork behind the decorative sheet metal.


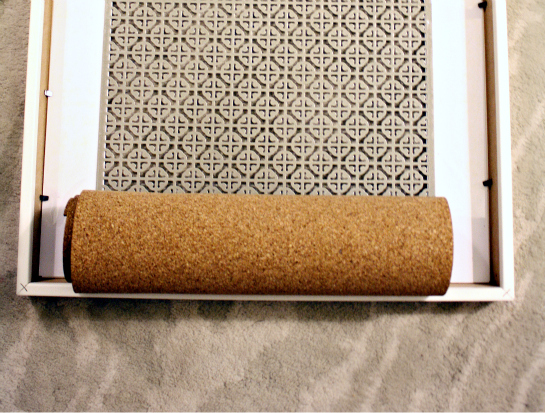
I affixed the cork with some packing tape, and then held it all down nice and sturdy by placing a piece of cardboard to the back with the frame clips.

I also Mod Podged some wrapping paper to the matte of the frame, to freshen it up a little bit.  All of these simple steps gave me a glorified cork push pin jewelry board!


I found the super cute fabric covered push pins from See Jane Work, and keep them in a small dish near the frame to make this display versatile as I add to my collection.


The earrings were then moved to a slightly smaller photo frame, I just removed the matte to allow for more hanging space.  There is no cork behind the earrings so that they can just easily dangle.


Oh, and if you are wondering where this is in our home, it's in a corner of our dressing room, which is right off of the master bedroom. 

The ceramic egg tray holds a few rings, stud earrings and extra backs, pins and some other miscellaneous pieces.


I found the hand from Urban Outfitters, it makes a great place to hold my bracelets and pop my wedding ring while I snooze...


When I started the project, I weeded out anything I don't wish to wear any longer and placed those items in my donate bag.  Now, all that I own, is out where I can see it and nothing is tucked away.  Nothing will be forgotten and I can now give myself a little more bling when I dress each morning.  You know, because a stay at home bloggy mom should always be sporting some jewels...

Is there anything you have out of sight, therefore out of mind that you are itching to dig out and begin using?  Or feel free to share how do you display your girly gems, I would heart to know what else is working for my friends!


Pssst!  The display was working great, I just wanted to simplify the look a bit so I swapped out the metal overlay with some fabric and I love it even more!  YAY for simple updates!


Wednesday, April 11, 2012

34 Reader Space: Trash to Treasure Garage Cubbies

With the onset of the nicer weather now that Spring is here, I recently found myself dreaming of garage updates... Then, much to my delight, today's reader popped over some photos of a recent project she completed for her garage and I was left feeling even more inspired!  So of course I had to share her super sweet story with you!


Jenn wrote:


Hi Jennifer,

I wanted to say I love your blog and that you inspire me to organize, organize, and do some more organizing.  This weekend I took on the massive project of organizing our garage filled with an unbelievable amount of stuff.

I too have 3 boys, who are very much into sports and their bats, balls, gloves, bikes and scooters have overrun our poor, helpless garage.  So this weekend I took some action.  I am a teacher and our building service manager was planning to throw out some well loved cubbies.  I couldn't let that happen.  Who would throw out some perfectly good cubby storage?  Obviously someone who has never been on Pinterest :)

So I took these raggedy cubbies home and gave them some TLC and breathed some new life into them.  I am so proud of my work that I thought I would share it with you, since your inspiration was what made me take on this crazy project.

All the best,
Jenn


I love that Jenn was able to look at an old, kicked to the curb piece of furniture, and see the potential!  Check out what she started with:


Not all that pretty at first, but Jenn changed with a couple of coats of paint!


And because she was able to see the potential, she now has THIS amazing garage and cubby storage to call her own!


  • Just look at the storage she gained, and to think, that piece almost went to the graveyard!  I love that Jenn was able to see the potential in a piece that someone else couldn't.
  • Cubbies are a really great way to store sport equipment, everything is easy to see, easy to grab, easy to put back.  A must with kiddos.
  • The rest of Jenn's garage deserves some props as well, it's rockin' all sorts of great storage!
  • Garage storage tends to be pricey, however Jenn's solution was just the opposite!  It's important to consider options outside of the typical and it's simple to check with your employers or Craigslist for old furniture pieces to keep those storage costs down.
  • This is a great visual reminder of how important it is to utilize all of that wall and ceiling space in the garage!
  • Just because something is going into the garage, doesn't mean it doesn't deserve a little love and beautification, just like if you were putting the storage piece inside your home.  Your garage is an extension of your home, and Jenn showed how taking the time to make the cubby system prettier, made a major difference in the overall aesthetics of the space.

Who else has been working on the garage, now that the weather is being spring friendly?  Who else found potential in something that others couldn't see?  Let's share some fun trash to treasure success stories!


ATTENTION!!  Want to be featured in a Reader Space edition?  Have an awesome organizing story to share?  I am looking for projects that have made a positive impact to your life.  Please send your story and photos to iheartorganizing@gmail.com and I would heart to feature them right here, on the blog!!  Photos should be high resolution and unedited.  Please include a description of the project, including any costs, inspiration, and how it has changed your life and routine for the better!  Oh, and no worries my friends, we will NEVER judge "before" pictures because that just wouldn't be nice!  Only love goes on at this blog!  More info HERE.


Tuesday, April 10, 2012

280 IHeart Giveaway: Luvloo Table Top Decals!

I have never hidden my love for using decals around the home as a temporary way to add some personalization or flair to any space.  And while I typically use them for labeling {everything}, I was recently introduced to a whole new word of decals that I couldn't wait to share with you! 


Luvloo specializes in creating stylish designs that will give just about any table in your home a unique facelift.  They use a high quality commercial grade material that turns your table from drab to fab in minutes!


The self adhesive decals bring a splash of style to your table all while making it easy to wipe away messes. The decals are easy to apply and easy to remove, without damaging your table. The decals are not moveable or reusable. It is best to apply the decals to a clean dry smooth surface free of chipping wood or paint.

There are so many fabulous patterns and options to select from!

 
And the table top decals are very easy to apply!


Giving you a unique and beautiful table top result!


Aren't they simply genius?!

This week, Luvloo is giving one lucky IHeart Organizing reader a custom table top decal, which is an $80 value!

{enter using the giveaway management tool below, just follow the simple steps}

a Rafflecopter giveaway

Right now when you head on over to the Luvloo website and enter "iheartorganizing" at checkout, you can save $15 off of your first order!

Good luck everyone!

43 Ooops, I Painted Again....

Doesn't that title make you want to start singing some Britney?

OK, so I am just going to throw it out there....

I painted the playroom.  Again.

I know, I know.  I change paint colors more than Jennifer Lopez changes husbands.

And let me just say, it's not easy to admit to you all that I made a bad initial paint choice.  OK, let me rephrase, I LOVED the color.  But it just wasn't right for us or our space.

Let me explain.

If you look at our lower level floor plan, you will notice a couple of things:
  • The playroom, family room and studio are all open to one another, creating a U shape around the stairs.
  • There are zero windows in the family room or studio, meaning little to no natural light.

Long ago, our entire lower level used to be a pretty, warm green color...

{super old photo alert!}

So when we began renovating it {due to a lower level flood} , I knew it was the chance to make some updates and play with a new color.  I had grown tired of the green and was hoping to make the space a little more current.  I knew without hesitation that I wanted a gray blue.  What I didn't realize until all of the walls were covered and I saw the color in all of the different rooms in different lighting situations, is that what I was getting was more of a blue blue gray...


The hardest part for me to swallow is that I made the first choice far too quickly.  This is what happens when you are under the gun to get a paint job done for some major life events we had happening last summer {nothing major, you know, just HGTV and a vow renewals...}  Yep, we were in a rush, and my walls paid the last minute decision price.  Seriously, shame on me, I know better than that!

And don't get me wrong.  I LOVE the blue in this photo of the playroom, and I know in my heart it would be awesome if it were only in a single room.  But as I mentioned, it flows to the lack of light family room and studio, making those areas even darker and all in all, it is just a lot of blue to look at.  For the last year, I have been struggling with making design choices to go with all of that blue and making everything flow nicely between all of the spaces. 

So I did it.  I just said, enough is enough, I am going to make this right.  I had swatches taped up by the trim for days and watched how they changed tone with the changes of the light throughout the day.  Then, the Mr. and I both weighed in and voted on the one we liked best and took our time selecting the color this time!   This is what should typically happen in the first place.

So, two hours later we went from a blue blue gray room, to a gray slightly blue room!


The new color is Behr's Reflecting Pool.   Love. 

Of course, it's always a challenge to photograph the exact color of a wall, but the photo above is fairly accurate.  Some of you noticed the color when I shared the changes we made to the entertainment center...


The color is a subtle yet a welcome update to the space.  Now, I feel like I can play even more with colorful toys and accents since the walls are much more muted and make for a nice backdrop to the fun that comes with a playroom.

We are Craigslisting one of the white clipcovered chairs and moving the other to our upper level {where we are also saying goodbye to the two brown slipper chairs}.   The playroom seating wasn't ideal for three kidlets or for mom and boys wanting to snuggle up to read.  So now to brainstorm new solutions to that and keep rolling with finally calling the playroom complete.

Here is what is left on our playroom wish list:
  • Updated light fixture
  • Window treatments
  • Seating
  • Additional toy storage
  • A fun wall treatment
  • Photographs/Artwork


So there you have it.  My big giant paint oops and a playroom update.

Who else has made a paint or design "oops" recently?