

And forgive in advance, I sit here by my lonesome typing up this post, while my husband gets credit for the work that has been done. I will do my best to relay his instructions, however, if you have any questions, feel free to ask within the comments and I will have him hop on for an Q&A session.
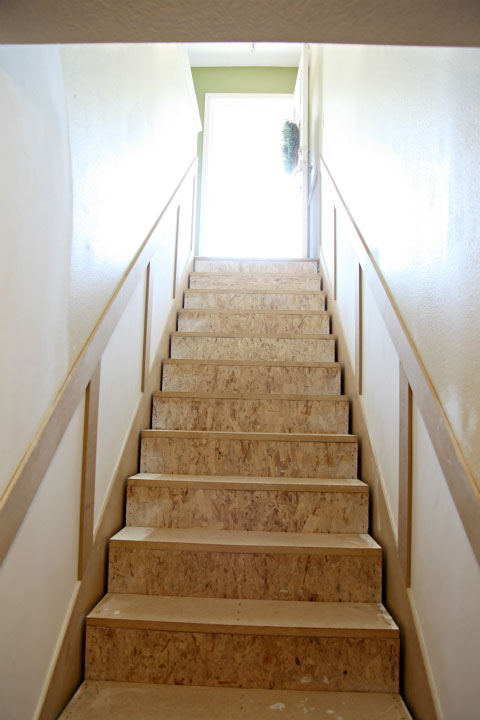
I last left you with this image:

Sooooo pretty! Ha! OK, maybe not yet, but it will be when we are done. Two years of living with yucky stairs, we are excited to make them beautiful!
In the first post, we had extended the wall and cut off the lips of the stairs that we found under the carpet that was pulled.
The next step was to focus on the walls. In all of the inspiration photos that I was most drawn to, there was a lovely white board and batten type wall treatment on the lower half of the walls. We decided to follow that plan with ours as well, since there is very little natural light in the stairway and I wanted to do whatever possible to lighten things up.
As you can see, we pulled the old oak skirts since they were never properly installed and had been pieced together to go the full length of our stairs. For the new skirts and the molding for the walls, we decided that MDF would be the route to go, since we could determine our exact cuts and measurements and also had plans of painting it all white anyway. We used 4' x 8' 1/2" MDF boards and cut everything down as we needed.
My husband and his dad did all of the measuring and cutting of the skirt and top rails. To determine exact measurements of the skirt, they measured off of the top and bottom stairs to ensure the skirt was a few inches taller, and then snapped with a chalk line.
All of the cut MDF was then installed with a brad nailer.

Then, they measured up from the stairs again to determine the height of the railing, and snapped the line again.

I often get asked about how we get projects like this done with kids. And in this case, I was on kid duty, Bryan and his dad were on stair duty. I popped in to check status and take pictures. I must have been MIA for awhile, because when I checked in for status, they had installed the rail height molding and dad had skimmed flat the entire area with taping mud, in-between the skirt and molding {no way did I want the textured walls within the new wall treatment. In fact, I don't want them at all... but I had to pick my battles}.


They let the newly flat walls dry and for a few days. It was looking so much better already!

The next step was to attach the vertical MDF boards. Here is a quickie diagram of what we were going for.

We wanted an even distance in-between the vertical boards, and approximately 3 feet wide "panels". It took us a bit to figure it out, but it was important to note and measure the diagonal length of the vertical pieces vs. the width. The width of the board was 4", but the diagonal was 5", so it impacts the overall placement.
At the top, the board landed at the angle.

We ended with a full board at the bottom.

Once all of the boards were installed, we filled all of the holes with wood putty and used white painters caulk to fill all of the board lines against the walls.

And sanded it all down flat.

For the wall treatment, the color choice was white, so I used a piece of our lower level trim to have it color matched to Behr's paint and primer paint, in a satin finish.

It took three coats to cover well and evenly, but it was so worth it in the end!

At the bottom of the stairs, we went back and forth on the best way to handle how to end the wall treatment in the cleanest way.

We decided that creating a mini-panel would look best.


Here is a progression shot to show what a difference the molding made:

It was looking a bajillion times better, although it is so hard to see past those ugly stairs. But oh how some new walnut stained treads changed that...
Stay tuned!

Pssst... the stairs are "one step" closer to finished! See the installed and stained treads here.
It looks so awesome. I love how you did the mini panel at the bottom too. Looks Great! Cant' wait to see the finished product!!
ReplyDeleteOoh, that looks quite a tricky and painstaking project, so credit to your husband and his dad - what a great result. Can't wait to see the next instalment, as I am itching to tackle our stairs. (We've some nice old wood panelling, but I want to rip up the carpet and paint the stairs.) Please post again soon!
ReplyDeleteWill try to post another update much quicker this next time! :)
Deletexo!
Jen
Looks great! I am anxious to hear all about the treads...I have been shopping for some too!
ReplyDeleteLooks so great - I'm going to have my husband do board & batten in our basement someday. It definitely brightens up the space!
ReplyDeleteGreat job. Stairs look much better
ReplyDeleteI have stairs that look just like that!! LOL The builder never put skirt boards on and never carpeted the basement stairs, and unfortunately neither have we!!! :(
ReplyDeleteI do love your board and battan treatment on the stairwell wall!! It looks fabulous. I can't wait to see it all finished.
Looks amazing!!!
ReplyDeleteThe funny thing to me is your hubs is working construction in flip flops... mine does this very same thing. Trimming trees, running a chainsaw, building whatever he builds, in flip flops. HAHA! I'm amazed he still has 10 toes!
Can't wait to see the finished product...
And by the way, your blog is AWESOME!!! :)
I totally copy-catted the built in wall unit!
Check it out!
http://nickandlisaweth.blogspot.com/2012/08/inspired.html
Oh, I know, we totally don't encourage DIYing in Flip flops. I wish so badly he would wear his slip-ons while he works, but he gets "too hot", lol.
Deletexo!
Jen
Amazing! Your husband has mad skills.
ReplyDeleteAlso, I just want to thank you for your previous post on that product which I MUST have. Where did it go?
can't wait to see the final product. this is starting to look really pulled together
ReplyDeleteWhat're you going todo about that gap at the edge of the stairs?
ReplyDeleteThe gap will go away once we add treads and risers over the top of the rough-in steps. Stay tuned for part 3 :)
Deletexo!
Jen
This looks so, so good! What a great improvement for a small investment. I am curious if you will put in a handrail. If so, would you mount it above the trim work? We have similar stairs in our home so curious what you would do. Thanks and great job!
ReplyDeleteWe absolutely want to do a handrail since the stairs will be slippery. We have a few ideas up our sleeves, but it will probably be the last item we tackle with this project.
Deletexo!
Jen
Lookin' good, Jen! Your husband is awesome. Can't wait to see Part 3!
ReplyDeleteAwesome! Love that look. So clean and simple and charming all rolled into one! Post again soon. :)
ReplyDeleteLooks fantastic! (And, as a math teacher, I love the fact that the Pythagorean Theorem was used in measuring for the cuts. You didn't mention it outright, but it was there in the diagonal vs. straight measure... a 3-4-5 right triangle just waiting for the math geek in me to spot it and use it as an example of how math is used in the "real world" which I will point out to my students tomorrow in class. Score!!!!)
ReplyDeleteBeautiful! I need a boy who can do things like this for me :)
ReplyDeleteWe just went through a similar Reno - walnut treads and all. Wish I could send you a picture but you will love the results!
ReplyDeleteWow!! It looks amazing!! What a difference already! Can't wait to see the finished project! :)
ReplyDeleteThat looks so great! I love the mini panels at the end of the staircase! I can't wait to see what you guys choose to do with the stairs :)
ReplyDeleteThese look great! We have similar looking stairs coming down to our basement!
ReplyDeleteOh my word -- that looks amazing, and my head hurts just trying to keep up with the math! that would have been a hot mess in our house! your hubs and dad are genius saints!
ReplyDeleteLove this! I want to do panels in our media room (which has stairs and a stage) so your diagram helps me see it happening... one day. :) The mini panels are quite adorable as well!
ReplyDeleteJen! It's looking amazing! I immediately sent this to my sister and mom who have similar staircases.
ReplyDeleteJust posted a our bathroom DIY over on my blog. Pop over and take a look to see if your readers would be interested as well!
Bathroom Remodel on Six2Eleven
Kim
Six2Eleven
The mini panels were my favorite part. It really catches your attention and draws your eye to the extra detail. I can't wait to see the completed project... please don't make us wait too long!!!!
ReplyDeleteJen the stairs are great already. Can't wait to see the finish product. :)
ReplyDeleteWhat? How did I miss this??? Amazing. I am dying to see how these turn out. We have wanted to do the same thing. Ahhh!!!
ReplyDeleteJen,
ReplyDeletePlease keep me updated on this. I'm DYING to do the same thing. I even tweeted Genivieve (Sp?) Gorder about my stairs, anti carpet with shaggy dog and kids issues. I also asked her about all the damn oak I have in my new house. It's like someone puked Oak all over and I'm not sure I have the patience to paint it. Anyway, I digress. Great post. I check your blog daily lady. Love it!!!!
Coffee soon please!!!!
Amy Vasterling
Looks great Jen!
ReplyDeleteThese stairs are looking so good!
ReplyDeleteAbsolutely beautiful Jen! Thanks for the inspiration!
ReplyDelete